How To Pedicure At Home DIY | Easy Steps for Beautiful Feet
A DIY pedicure at home is an easy way to care for your feet without visiting a salon. With a few basic supplies and ingredients already available in your home, you can clean your feet, soften rough areas, shape your toenails, moisturize dry skin, and create a neat polished finish.
A home pedicure can be as simple or elaborate as you like. You can make a quick foot soak, prepare a gentle homemade scrub, massage your feet with moisturizer, or finish with a colorful nail design. The most important part is using gentle techniques rather than trying to remove too much skin or cutting the nails too aggressively.
This guide explains how to pedicure at home DIY-style, including preparation, homemade foot-care ideas, nail shaping, exfoliation, moisturizing, polish application, and simple maintenance.
What You Need for a DIY Pedicure
You do not need a professional pedicure kit to get started. Gather the basic items before beginning.
Simple DIY Pedicure Supplies
You can use:
- Nail clippers
- Nail file
- Small basin or bowl
- Warm water
- Mild soap
- Clean towel
- Soft foot brush
- Sugar or another gentle exfoliant
- Body lotion or foot cream
- Cuticle oil
- Cotton pads
- Nail polish remover
- Base coat
- Nail polish
- Top coat
A pumice stone or foot file can also be useful for areas of thicker skin, particularly around the heels.
How To Pedicure At Home DIY | Easy Steps for Beautiful Feet:


Prepare Your DIY Foot Station
Choose a comfortable place where you can sit with your feet supported.
Place your basin, towel, nail tools, and skincare products within easy reach. Good lighting is helpful when trimming nails and applying polish.
Wash your hands before starting and make sure the tools you use are clean.
Remove Old Nail Polish
If your toenails already have polish, remove it before beginning the new pedicure.
Use nail-polish remover and cotton pads to clean the entire nail surface. Pay attention to the corners and edges where old color can remain.
Once the polish is gone, inspect the nails before continuing.
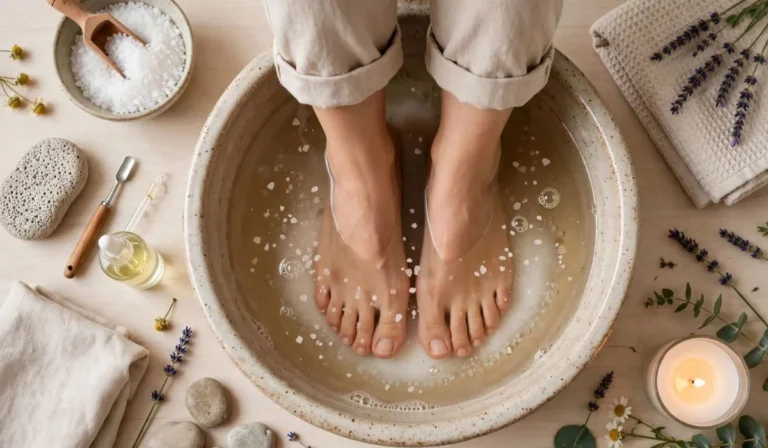
Make a Simple Warm Foot Soak
Fill a basin with comfortably warm water.
Add a small amount of mild soap or body wash and mix it into the water.
Place your feet in the basin and relax for approximately 5 to 10 minutes.
DIY Foot Soak With Epsom Salt
If you already have Epsom salt at home, you can add some to warm water for a relaxing soak. Epsom salt is commonly used in home foot baths, although soaking does not magically remove calluses or cure foot conditions.
The main purpose of the soak in a basic pedicure is to cleanse the feet and make the routine more relaxing.
Oatmeal Foot Soak
Finely ground plain oats can be added to warm water for a simple soothing bath.
Avoid using coarse pieces that may feel scratchy against the skin. After soaking, rinse your feet and dry them carefully.
Dry Your Feet Completely
Remove your feet from the water and pat them dry with a clean towel.
Do not forget the spaces between your toes. Keeping those areas dry is an important part of everyday foot hygiene.
Now your feet are ready for nail trimming and exfoliation.
Trim Your Toenails at Home
Use clean nail clippers to trim the toenails.
Try to cut them relatively straight across rather than creating a deeply curved shape at the corners.
Do Not Cut Toenails Extremely Short
Very short toenails can become uncomfortable, particularly when shoes create pressure around the toes.
Leave a small amount of visible nail rather than cutting all the way down to the skin.
Shape the Toenails With a File
After clipping, use a nail file to smooth sharp or uneven edges.
Move the file gently and concentrate on areas that feel rough.
For a natural DIY pedicure, follow the existing shape of your toenails rather than trying to create an artificial shape.
Try a Homemade Sugar Foot Scrub
A simple sugar scrub can be prepared with ingredients commonly found at home.
Combine a small amount of sugar with a moisturizing ingredient such as a little coconut oil or another suitable body oil.
Massage the mixture gently over the soles and rough areas.
How to Use a DIY Sugar Scrub
Apply a small amount to damp skin and massage lightly using circular movements.
Concentrate on the heels, sides of the feet, and other areas that feel rough.
Rinse thoroughly afterward.
Avoid aggressive scrubbing. A rougher scrub is not necessarily a better scrub.
DIY Coffee Foot Scrub
Ground coffee can also be used as a body exfoliant, but the particles can be relatively coarse.
If you use coffee grounds, massage very gently and avoid rubbing irritated or damaged skin.
A finer texture is preferable for sensitive areas.
Give Your Heels Extra Attention
The heels often become rough because they experience repeated pressure and friction.
After soaking, gently use a pumice stone or foot file if needed.
Work gradually rather than trying to remove every rough patch in one session.
What Not to Do With Rough Heels
Do not cut callused skin with blades, scissors, or other sharp objects at home.
Aggressive removal can cause cuts and increase the risk of irritation or infection.
If you have persistent, painful, deeply cracked, bleeding, or unusually thick skin, professional medical advice is more appropriate than aggressive DIY treatment.
Gently Care for the Cuticles
Apply a small amount of cuticle oil or moisturizer around the toenails.
Allow the area to soften before gently pushing back excess cuticle tissue with a suitable tool.
Is Cutting Cuticles Necessary?
No. You can have a neat-looking pedicure without cutting the cuticles.
Avoid digging under the nail or aggressively cutting the skin surrounding it.
Make a Homemade Foot Moisturizer Routine
After exfoliating, apply a generous amount of foot cream or body moisturizer.
Massage the product into the heels, soles, toes, and tops of the feet.
For particularly dry heels, apply moisturizer before bedtime and wear comfortable cotton socks if appropriate.
Keep Moisturizer Between the Toes to a Minimum
The spaces between the toes can remain damp more easily than other parts of the foot.
Apply moisturizer mainly to dry skin on the soles, heels, and tops of the feet, while keeping the spaces between the toes clean and dry.
Try a DIY Foot Massage
A foot massage can turn an ordinary home pedicure into a relaxing self-care routine.
Apply a small amount of lotion or suitable oil and use your thumbs to make slow circular movements across the soles.
Massage the heel, arch, and ball of the foot without applying painful pressure.
Clean the Toenails Before Painting
If you used oil, lotion, or a homemade scrub, clean the nail plate before applying polish.
The surface should be dry and free from excess oil.
You can use a cotton pad with nail-polish remover to remove residue.
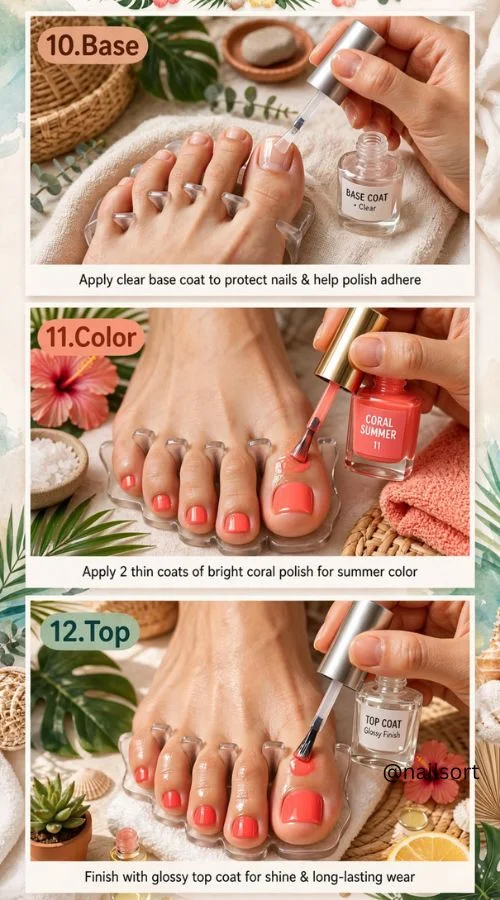
Apply a Base Coat
A base coat provides a smooth foundation for your polish.
It can also help minimize staining from some strongly pigmented colors.
Apply a thin layer and allow it to dry according to the product instructions.
Read next: How To Pedicure At Home | Easy Steps for Salon-Worthy Feet
Create a DIY Nude Pedicure
For a simple natural look, choose a sheer nude, beige, soft pink, or milky shade.
Apply two thin coats and finish with a glossy top coat.
This style works particularly well when you want your toenails to look polished without bright colors.
Make a DIY French Pedicure
A French pedicure can be created at home with a nude or sheer pink base and white tips.
Let the base dry first.
Then carefully add thin white tips to the toenails. If your hand is not steady, use a small nail-art brush instead of the regular polish brush.
Try a DIY Floral Pedicure
Paint the toenails with a soft pink, white, lavender, or pastel base.
Use a dotting tool or the end of a small clean tool to create five tiny dots around a center dot.
This creates a simple flower without requiring advanced nail-art skills.
Create Colorful Dot Designs
Dots are one of the easiest DIY nail-art patterns.
Start with a solid base color and add small contrasting dots to the big toenails.
Try:
- White dots over blue
- Pink dots over orange
- Yellow dots over lavender
- Green dots over white
- Gold dots over nude
You can vary the dot sizes to create a more artistic pattern.
Try a DIY Ombre Pedicure
An ombre pedicure uses shades that gradually change from one color to another.
You could use pale pink, medium pink, and bright pink across different toenails.
Another option is a sunset progression from yellow to orange to coral.
This approach creates a coordinated look without requiring complicated artwork.
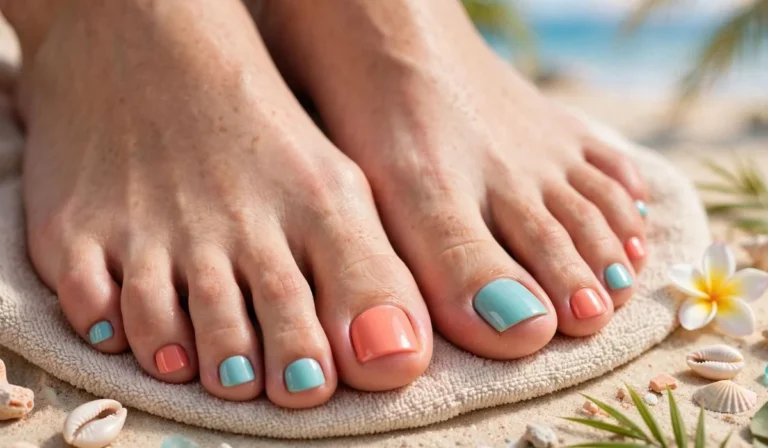
Create a DIY Beach Pedicure
For a beach-inspired design, combine aqua, turquoise, white, and sandy beige.
You can paint the big toenails aqua and use white wave lines as an accent.
Tiny dots can represent bubbles or sea foam.
Try a DIY Fruit-Inspired Pedicure
Summer fruit can provide easy nail-art inspiration.
Try tiny strawberries, cherries, lemons, oranges, or watermelon slices on the big toenails.
Keep the remaining toenails in a single coordinating color so the design does not become overcrowded.
Finish With Top Coat
After the color and nail art are sufficiently dry, apply a thin top coat.
Cover the nail evenly and lightly brush across the tip.
A top coat can improve shine and add a protective layer over the design.
Give the Pedicure Enough Drying Time
Do not immediately put on tight socks or closed shoes.
Even if the surface feels dry, multiple layers underneath can remain soft for longer.
Allow adequate drying time according to the products you are using.
DIY Pedicure Without Nail Polish
A polished appearance does not require colored nail polish.
Trim and file the nails, gently exfoliate the feet, moisturize dry areas, and lightly buff the nail surface if desired.
This creates a clean, natural appearance that works well for everyday life.
DIY Pedicure for Very Dry Feet
If your feet are especially dry, concentrate on consistent moisturizing rather than aggressive exfoliation.
Use a suitable foot cream regularly and gently exfoliate rough areas when needed.
A thick moisturizer applied at night can be useful for dry heels.
Avoid Excessive Exfoliation
Scrubbing the feet every day can irritate the skin.
A better approach is gentle exfoliation combined with regular moisturizing.
DIY Pedicure for Beginners
If you are doing your first pedicure, keep the process simple.
Clean the feet, soak them briefly, trim the toenails straight across, file rough edges, gently exfoliate, moisturize, and apply one simple nail color.
Once you become comfortable with the basic routine, you can experiment with French tips, flowers, gradients, and other designs.
How Often Should You Do a DIY Pedicure?
The ideal schedule depends on your toenail growth, skin condition, footwear, and personal preference.
You can perform basic foot maintenance more frequently while doing a full cosmetic pedicure whenever your nails and skin need it.
There is no need to aggressively scrub or file your feet every time.
DIY Pedicure Hygiene Facts
Toenails and the surrounding skin should be handled with clean tools.
Do not share personal nail tools without appropriate cleaning and disinfection.
Foot basins should also be washed after use.
Avoid applying polish over nails or surrounding skin that appear infected, injured, or significantly irritated.
Important Foot-Care Details
Toenails grow more slowly than fingernails, which is one reason pedicures generally require less frequent trimming.
The nail plate is primarily composed of keratin, a structural protein.
Rough heels commonly develop in response to pressure and friction.
Moisturizing helps support the skin barrier, while gentle exfoliation removes some surface dead skin.
A cosmetic pedicure cannot replace medical treatment for a foot or nail condition.
DIY Pedicure Mistakes to Avoid
Using Extremely Hot Water
Very hot water can be uncomfortable and may dry or irritate the skin.
Use comfortably warm water instead.
Scrubbing Too Hard
Aggressive exfoliation can leave the skin irritated rather than smooth.
Cutting Nails Into the Corners
Avoid deeply cutting the sides of toenails.
Using Sharp Tools on Calluses
Never cut thick skin with blades or sharp household objects.
Applying Polish Over Oily Nails
Oil and lotion can interfere with polish adhesion.
Clean the nail surface before painting.
Wearing Shoes Too Soon
Fresh polish can smudge when pressed against socks or shoes before it has adequately dried.
A Simple DIY Pedicure Schedule
For everyday maintenance, wash and dry your feet properly and moisturize dry areas.
When your toenails need attention, trim and file them.
When your heels become rough, add gentle exfoliation.
When you want a finished appearance, add polish and nail art.
This flexible approach is easier to maintain than performing an elaborate pedicure every few days.
FAQs
How do I do a pedicure at home DIY?
Start by cleaning your feet, soaking them briefly in warm water, trimming and filing your toenails, gently exfoliating rough areas, moisturizing the feet, and applying nail polish if desired.
What can I use at home for a DIY foot scrub?
Sugar mixed with a suitable moisturizing ingredient can make a simple body scrub. Use gentle pressure and avoid applying scrubs to irritated or damaged skin.
Can I make a pedicure without a foot spa?
Yes. A clean basin or large bowl filled with comfortably warm water is sufficient for a basic home foot soak.
How long should I soak my feet for a DIY pedicure?
Around 5 to 10 minutes is generally enough for a basic pedicure. A longer soak is not necessary.
How can I soften my feet naturally at home?
Regular moisturizing combined with gentle exfoliation can help improve the feel of dry, rough skin. Avoid aggressively removing thickened skin.
What is the easiest DIY pedicure for beginners?
A simple trim-and-file routine followed by moisturizer and one solid nail color is the easiest place to start. You can add nail art after becoming comfortable with the basics.
Can I use sugar as a homemade foot scrub?
Yes, sugar can be used as a gentle body exfoliant when combined with a suitable moisturizing ingredient. Massage lightly rather than scrubbing aggressively.
How can I make my heels smooth at home?
Gently exfoliate rough heel skin, use a foot file when appropriate, and moisturize regularly. Consistency is more useful than aggressively filing the skin.
Should I cut my toenail cuticles during a DIY pedicure?
You do not need to cut them. Gently softening and pushing back excess cuticle tissue is generally enough for a neat cosmetic pedicure.
What is the best way to cut toenails at home?
Trim them relatively straight across and avoid cutting deeply into the corners. File sharp edges afterward.
Can I do a French pedicure myself?
Yes. Apply a sheer nude or pink base, allow it to dry, then add thin white tips. A small nail-art brush can make the process easier.
How can I make a DIY pedicure last longer?
Start with clean, dry nail plates, use thin layers of polish, allow adequate drying time, and finish with a top coat. Avoid excessive friction immediately after painting.
Can I do a DIY pedicure without nail polish?
Absolutely. Nail trimming, filing, gentle exfoliation, moisturizing, and basic nail care can create a clean natural pedicure without colored polish.
How often should I exfoliate my feet?
There is no single schedule for everyone. Gentle exfoliation when the skin becomes rough is preferable to aggressive daily scrubbing.
When should I avoid doing a DIY pedicure?
Avoid aggressive cosmetic treatment if you have open cuts, significant irritation, painful cracks, signs of infection, or unexplained changes around the nails. In those situations, professional medical advice may be appropriate.