How To Pedicure At Home | Easy Steps for Salon-Worthy Feet
Learning how to pedicure at home can save time and money while keeping your feet looking neat, smooth, and well cared for. A basic home pedicure does not require expensive equipment. With a nail clipper, file, basin of warm water, foot scrub, moisturizer, base coat, nail polish, and top coat, you can create a salon-inspired result at home.
A good pedicure is about more than applying pretty polish. Proper nail trimming, gentle exfoliation, moisturizing, and careful polish application can make the entire process look cleaner and more comfortable.
Whether you want a simple natural pedicure, a colorful summer look, or polished toes for an upcoming event, this step-by-step routine can be adapted to your needs.
What You Need for a Home Pedicure
Gather everything before starting so you do not have to move around with wet nails.
Basic Pedicure Supplies
You can prepare:
- Nail clippers
- Nail file
- Nail buffer
- Small basin or foot tub
- Warm water
- Mild soap or body wash
- Foot scrub
- Foot brush
- Clean towel
- Cuticle pusher
- Cuticle oil
- Foot cream or moisturizer
- Base coat
- Nail polish
- Top coat
- Cotton pads or cotton swabs
- Nail-polish remover
You do not need every specialized salon tool. A simple setup is enough for a regular at-home pedicure.
How To Pedicure At Home | Easy Steps for Salon-Worthy Feet:


Start With Clean Feet
Before trimming or polishing your toenails, wash your feet thoroughly. Cleaning removes sweat, dirt, and product residue that can interfere with the pedicure.
Use warm water and a gentle cleanser. Pay attention to the spaces between the toes and around the toenails.
Dry your feet completely with a clean towel, especially between the toes.
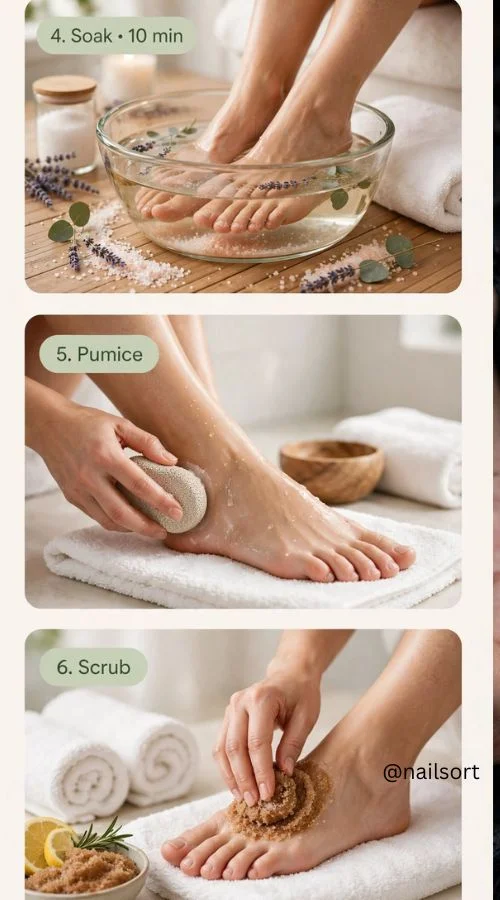
Soak Your Feet
Fill a basin with comfortably warm water and soak your feet for several minutes.
A short soak can soften surface debris and make the feet feel more relaxed. The water should be warm rather than very hot.
How Long Should You Soak Your Feet?
Around 5 to 10 minutes is generally enough for a simple home pedicure.
There is no need for an extremely long soak. Prolonged exposure to water can leave the skin overly soft and may make the nail surface hold more moisture temporarily.
You can add a small amount of mild body wash if desired, but plain warm water also works.
Trim Your Toenails Correctly
After soaking, dry your feet before trimming.
Use clean nail clippers and cut the toenails relatively straight across. Avoid cutting deeply into the corners.
Why Straight Toenail Trimming Matters
Cutting toenails too deeply at the sides can increase the chance of irritation and may contribute to problems around the nail edges.
Do not try to create an exaggerated rounded shape. Toenails generally look neat when the natural shape is preserved.
If your toenails are already short, simply remove uneven or rough edges instead of cutting them significantly shorter.
File the Edges
Use a nail file to smooth rough areas left after clipping.
Move the file gently rather than aggressively sawing back and forth. Shape the corners only enough to remove sharp edges.
A fine-grit file can be useful for finishing because it produces a smoother edge.
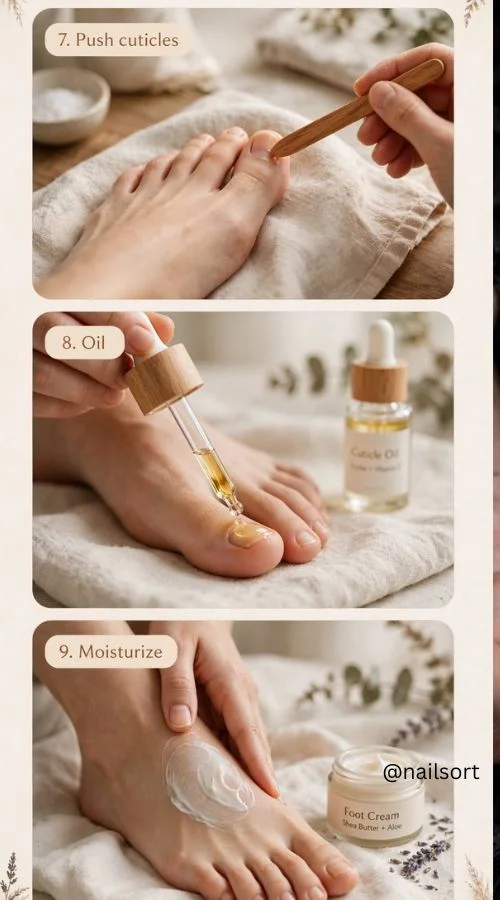
Gently Push Back the Cuticles
After the feet have been cleaned and the nails softened, gently push back the cuticles with a suitable cuticle pusher.
Do not force the tool against the nail or surrounding skin.
Should You Cut Your Cuticles?
Cutting cuticles is not necessary for an attractive home pedicure. The cuticle helps protect the area around the nail, so aggressive cutting can cause irritation or small injuries.
Instead, soften the area with cuticle oil or moisturizer and gently push back excess skin if needed.
Read next: Summer Pedicure Ideas | Cute & Trendy Styles for Sunny Days
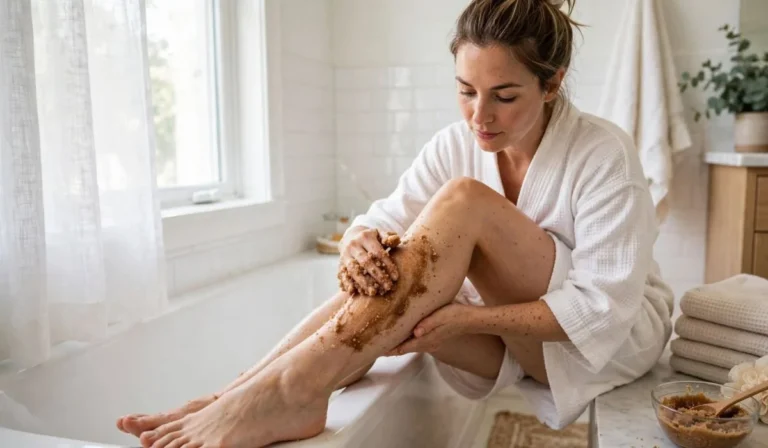
Exfoliate Your Feet
Apply a foot scrub to remove loose surface skin and leave the feet feeling smoother.
Concentrate on areas that commonly become rough, such as the heels, sides of the feet, and balls of the feet.
Massage gently for a short period and rinse thoroughly.
Avoid Over-Scrubbing
More scrubbing does not necessarily produce better results. Excessive exfoliation can irritate the skin and may make roughness worse over time.
For a routine pedicure, gentle exfoliation is usually sufficient.
Smooth Rough Heels Carefully
If your heels are rough, use a foot file or pumice stone gently after soaking.
Work gradually instead of trying to remove a large amount of hardened skin in one session.
How Often Should You Use a Foot File?
The ideal frequency depends on how quickly your skin becomes rough. Many people can incorporate gentle foot filing into their regular foot-care routine without needing aggressive treatment.
If the skin is cracked, painful, bleeding, or unusually thick, avoid aggressive filing and consider professional medical advice.
Rinse and Dry Again
Once exfoliation is finished, rinse away the scrub and dry your feet thoroughly.
Pay particular attention to the areas between the toes.
This step prepares the skin for moisturizing and gives you a clean surface before nail polish application.
Moisturize Your Feet
Apply a generous amount of foot cream or moisturizer to the heels, soles, and tops of the feet.
Massage the product into the skin using circular movements.
Keep Lotion Away From the Nail Plate
If you plan to apply nail polish, avoid leaving oily cream on the nail surface. Polish adheres better to a clean, dry nail.
You can moisturize the feet first and then wipe the toenails with a suitable nail-polish remover before applying polish.
Prepare the Toenails for Polish
Before painting, make sure the toenails are clean and dry.
Remove any oil, lotion, or leftover polish from the nail plate.
Place your feet in a comfortable position where you can clearly see each toenail. Good lighting is particularly helpful when applying polish.
Apply a Base Coat
A base coat creates a smoother foundation for color and can help reduce staining from strongly pigmented polishes.
Apply a thin layer rather than a thick one.
Allow it to become sufficiently dry according to the product instructions before continuing.
Apply Your First Color Coat
Choose your favorite color and apply a thin layer.
Start near the base of the toenail without flooding the surrounding skin. Then pull the brush toward the tip using controlled strokes.
Do not worry if the first coat looks slightly uneven. The second coat usually improves the coverage.
Why Thin Coats Work Better
Thick polish layers can take longer to dry and may be more likely to smudge or dent.
Two thin color coats generally provide a more even finish than one very thick coat.
Add a Second Coat
Once the first layer is sufficiently dry, apply another thin coat.
Try to maintain the same number of coats across the toenails for a consistent appearance.
For very sheer colors, an additional thin layer may sometimes be useful.
Clean Up the Edges
If polish gets onto the surrounding skin, wait until the application is settled enough to clean the edges carefully.
Use a small brush or cotton swab with nail-polish remover to correct mistakes.
This simple cleanup step can make an at-home pedicure look much more professional.
Add Simple Nail Art
You can leave the pedicure as a solid color or add a small decorative element.
Easy designs include:
- Tiny dots
- Micro flowers
- French tips
- Small hearts
- Thin lines
- Stars
- Color blocks
- Simple waves
- Glitter accents
For beginners, decorating only the big toenails is usually easier than creating detailed artwork on every toe.
Finish With Top Coat
Apply a thin layer of top coat after the color and nail art have settled.
A top coat can add shine and provide a protective layer over the polish.
Apply it evenly across each nail, including the tip where possible.
Let Your Toenails Dry Properly
One of the most important parts of a home pedicure is allowing enough drying time.
Avoid immediately putting on tight socks or closed shoes after painting your toenails.
How Long Should a Pedicure Dry?
Drying time varies considerably depending on the polish, number of layers, room conditions, and top coat.
Even when polish feels dry on the surface, deeper layers may still be soft. Give your pedicure adequate time before activities that involve pressure or rubbing.
Try a Natural At-Home Pedicure
You do not have to use nail polish to have attractive, well-maintained feet.
Trim and shape the nails, smooth rough areas gently, moisturize thoroughly, and buff the nail surface lightly if desired.
A natural pedicure can look clean and polished without adding color.
Try a French Pedicure at Home
For a classic appearance, start with a sheer pink, nude, or milky base.
After it dries, paint a thin white line along the free edge of each toenail.
If traditional French tips are difficult, use a very thin brush or nail-art tool rather than trying to apply a thick stripe with the regular polish brush.
Create a Quick Five-Minute Polish Refresh
When you do not have time for a full pedicure, focus on the essentials.
Remove chipped polish, clean the nails, file uneven edges, apply a fresh coat of color if necessary, and finish with top coat.
This quick routine is useful before wearing open-toe shoes.
Make Your Home Pedicure More Relaxing
A pedicure can also become part of a simple self-care routine.
Prepare your towel and products beforehand, play relaxing music, and give yourself enough time to work without rushing.
A comfortable seating position is important because bending awkwardly for a long time can make the process unnecessarily difficult.
How Often Should You Pedicure at Home?
There is no universal schedule because toenail growth and skin condition vary from person to person.
Many people refresh their pedicure every few weeks, while others simply maintain their nails and repaint when the polish begins to chip.
Instead of following a strict calendar, look at the condition of your nails and skin.
Common Home Pedicure Mistakes
Several small mistakes can make a home pedicure less effective.
Cutting Toenails Too Short
Cutting too aggressively can leave the nail edges uncomfortable. Keep enough nail length to protect the toe and avoid digging into the corners.
Using Too Much Polish
Thick coats may remain soft underneath even when the surface appears dry.
Painting Over Oily Nails
Moisturizer and cuticle oil left on the nail plate can interfere with polish adhesion.
Aggressively Removing Calluses
Trying to remove every bit of thickened skin can irritate the feet. Gentle, consistent care is usually preferable to aggressive filing.
Skipping the Base Coat
A base coat is particularly useful with darker or highly pigmented colors because it provides an extra layer between the nail and color.
Home Pedicure Hygiene Tips
Keep your nail tools clean and do not share personal nail equipment without proper cleaning and disinfection.
Use clean towels and wash your hands before and after the pedicure.
If you use a foot basin, clean it thoroughly after use so residue and microorganisms do not remain inside.
Avoid performing a cosmetic pedicure over irritated, infected, bleeding, or seriously damaged skin.
Helpful Facts About Toenail Care
Toenails grow more slowly than fingernails, so they usually require less frequent trimming.
The visible nail is made primarily of keratin, a tough structural protein also found in hair and the outer layer of skin.
Healthy-looking nails are not necessarily perfectly white or completely smooth. Natural ridges, slight variations in color, and differences in nail shape can occur.
The skin on the heels can become thicker because repeated pressure and friction encourage the formation of additional protective skin.
A Simple Weekly Foot-Care Routine
You do not need to perform a complete pedicure every week.
A simple maintenance routine can include washing and drying the feet carefully, applying moisturizer to dry areas, checking the toenails for rough edges, and keeping socks and footwear clean and comfortable.
A full pedicure can then be performed when the nails need trimming, the polish needs replacing, or the skin needs additional care.
FAQs
Can I do a pedicure at home without special tools?
Yes. Basic tools such as nail clippers, a nail file, a basin, towel, moisturizer, and nail polish are enough for a simple pedicure.
What should I do first when pedicuring at home?
Start by gathering your supplies and cleaning your feet. You can then soak them briefly, dry them, trim and file the toenails, exfoliate, moisturize, and finish with polish if desired.
How long should I soak my feet before a pedicure?
A short soak of around 5 to 10 minutes is generally enough for a basic home pedicure. Very hot water and prolonged soaking are unnecessary.
Should I cut my toenail cuticles?
You do not need to cut your cuticles for a good pedicure. Gently softening and pushing them back can be enough.
Should toenails be cut straight across?
Generally, cutting toenails relatively straight across is a good approach. Avoid cutting deeply into the corners or creating an exaggerated rounded shape.
How do I make my home pedicure look professional?
Focus on clean nail shaping, thin polish coats, careful application, neat edges, and sufficient drying time. A clean base and top coat can make a significant difference.
Why does my toenail polish chip quickly?
Chipping can be related to oily nails, thick polish layers, insufficient drying time, frequent water exposure, friction from footwear, or the particular polish being used.
Can I moisturize before applying nail polish?
Yes, but remove excess oil or moisturizer from the nail plate before polishing. The nail surface should be clean and dry.
How can I soften rough heels at home?
Regular moisturizing combined with gentle exfoliation and careful use of a foot file can help improve rough heels. Avoid aggressively removing thick skin.
Is it okay to paint toenails all the time?
Many people regularly wear toenail polish without problems, but removing polish periodically allows you to inspect the nails and surrounding skin. If you notice unusual discoloration, pain, swelling, or other changes, avoid simply covering the area with polish.
How long should I wait before wearing shoes after a pedicure?
Wait until the polish is adequately dry, and preferably avoid footwear that presses directly against the toenails immediately afterward. Drying time varies by product and the number of layers applied.
What is the easiest pedicure for beginners?
A beginner-friendly pedicure is a clean, straight-across trim, gentle filing, moisturizer, base coat, two thin coats of one polish color, and a top coat. It gives a polished result without complicated nail art.