Manicure At Home Steps | Easy Guide for Perfect Nails
A manicure at home can be simple, relaxing, and budget-friendly when you follow the right order. You do not need a professional nail salon or a large collection of tools to create clean, healthy-looking nails. With a few basic supplies and enough time, you can shape your nails, care for your cuticles, smooth the surface, and finish with your favorite polish.
The most important part of a home manicure is preparation. Cleaning the nails, filing them correctly, applying thin polish layers, and allowing enough drying time can make the final result look much neater.
What You Need for a Manicure at Home
Before starting, gather everything you need so you do not have to interrupt the process.
Basic supplies include:
- Nail polish remover
- Cotton pads or lint-free wipes
- Nail clippers
- Nail file
- Nail buffer
- Cuticle pusher
- Cuticle oil
- Hand cream
- Base coat
- Nail polish
- Top coat
- Small bowl of warm water
- Clean towel
Optional Nail-Art Tools
If you want to add simple nail art, you can also keep a dotting tool, thin nail-art brush, stickers, glitter, or a clean toothpick nearby.
Manicure At Home Steps | Easy Guide for Perfect Nails:
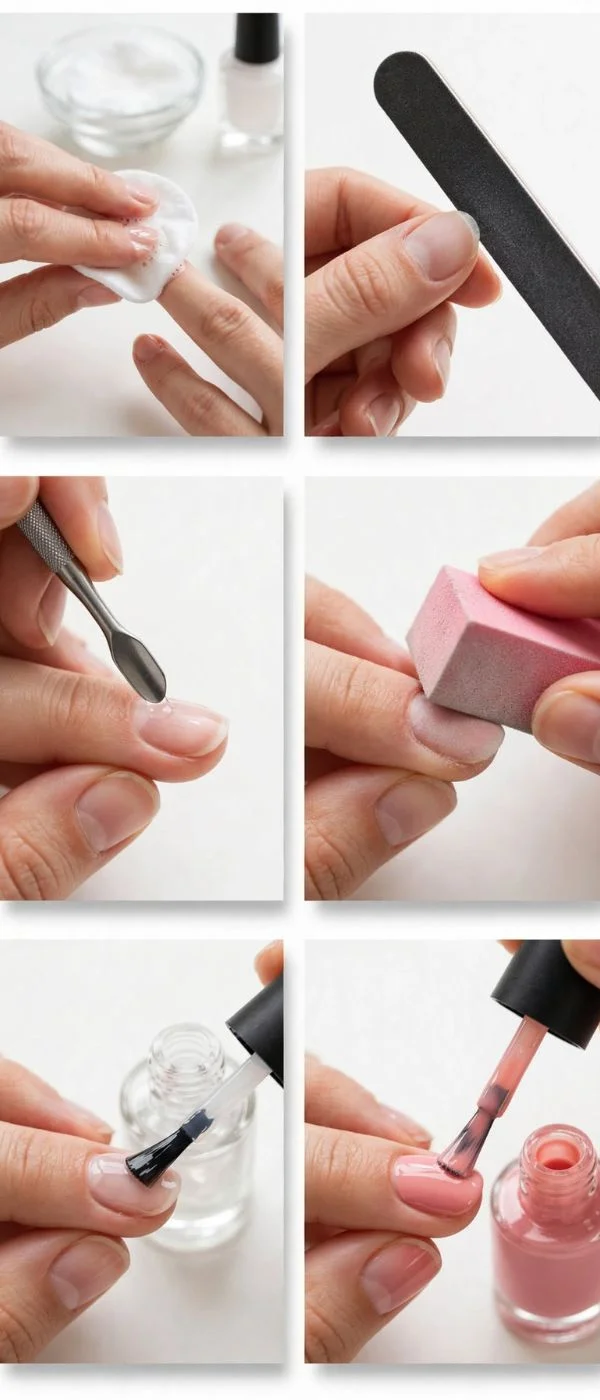

Step 1: Remove Old Nail Polish
Begin with completely clean nails. Use nail polish remover and a cotton pad to remove old polish, glitter, or leftover color.
Take Extra Care With Glitter
Glitter polish can be difficult to remove by rubbing alone. Hold a remover-soaked cotton pad against the nail for several seconds before gently wiping it away.
Step 2: Wash Your Hands
Wash your hands with mild soap and water to remove remaining remover, dust, and surface residue. Dry them thoroughly with a clean towel.
Clean nails provide a better starting point for filing and polishing.
Step 3: Trim Your Nails
If your nails are significantly longer than you want, use nail clippers to shorten them. Avoid cutting too deeply into the corners.
Choose a Comfortable Length
For everyday activities, a moderate length can be easier to maintain. Shorter nails may also be more practical if you frequently type, cook, clean, or work with your hands.
Read next: 25 Manicure Nail Ideas
Step 4: File the Nail Shape
Use a nail file to refine the shape after trimming. File gently in one direction rather than aggressively sawing back and forth.
Popular nail shapes include:
- Round
- Oval
- Square
- Squoval
- Almond
- Coffin
Create Matching Shapes
Look at both hands together while filing. Keeping the nails similar in length and shape makes the finished manicure look more professional.
Step 5: Soften the Cuticles
Place your fingertips in a bowl of comfortably warm water for a few minutes. This can soften the surrounding skin and make gentle cuticle care easier.
Keep the Soak Short
There is no need to leave your hands in water for a long time. A brief soak is enough for basic home manicure preparation.
Step 6: Gently Push Back the Cuticles
After drying your hands, use a clean cuticle pusher to gently push back the cuticles.
Do not force the tool or scrape aggressively. The cuticle area protects the nail and surrounding tissue, so gentle handling is important.
Avoid Cutting Healthy Cuticles
For a simple home manicure, pushing back the cuticles is generally preferable to aggressively cutting them. If you have painful, swollen, cracked, or infected skin around a nail, skip cosmetic cuticle work and allow it to recover.
Step 7: Apply Cuticle Oil
Massage a small amount of cuticle oil around each nail. Give particular attention to the skin along the sides and base of the nail.
Give the Oil Time to Absorb
You can massage the oil into the skin for a few moments before moving on. If you plan to apply polish, remove excess oil from the nail surface afterward because oily nails can interfere with polish adhesion.
Step 8: Lightly Buff the Nail Surface
A nail buffer can smooth minor surface irregularities. Use it gently and avoid excessive buffing.
Do Not Over-Buff
The natural nail has layers, so aggressive or frequent buffing can make it thinner and more fragile. Buff only when necessary.
Step 9: Clean the Nails Again
Before applying polish, make sure the nail plates are clean and free from oil, cream, and dust.
A clean surface helps the base coat adhere more effectively.
Step 10: Apply a Base Coat
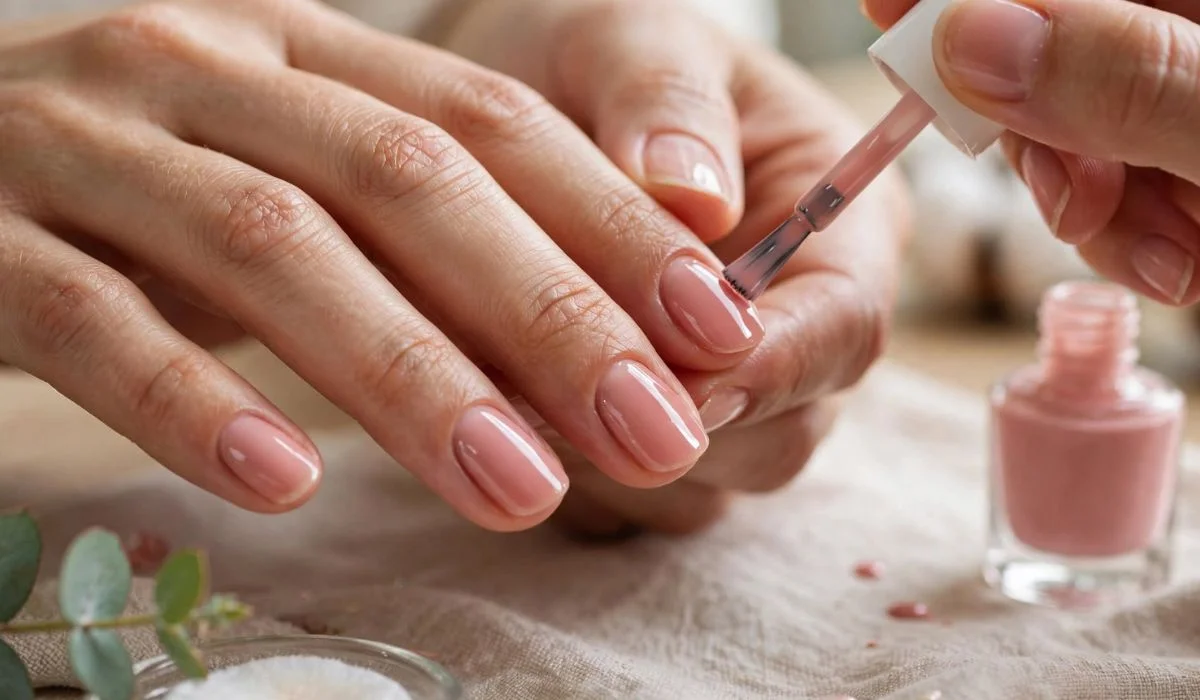
Apply a thin layer of base coat to each nail. A base coat creates a smooth foundation and can help protect the natural nail from staining caused by some strongly pigmented polishes.
Let It Set
Follow the drying instructions for your chosen product. Avoid touching the nail surface while it is still wet.
Step 11: Apply the First Layer of Nail Polish
Choose your favorite nail color and apply a thin coat. Start near the base of the nail without flooding the cuticle area, then pull the brush toward the tip.
Keep the Layers Thin
Two thin coats usually provide better control than one very thick coat. Thick polish can take longer to dry and may become uneven or dent easily.
Step 12: Add the Second Coat
Once the first coat has set sufficiently, apply another thin layer. The second coat can improve color coverage and make the finish look more even.
Clean Small Mistakes
If polish touches the surrounding skin, use a small brush or cotton swab with a little remover to clean the edges carefully.
Step 13: Add Simple Nail Art
You can leave the manicure plain or add a simple decorative detail.
Easy options include:
- Tiny dots
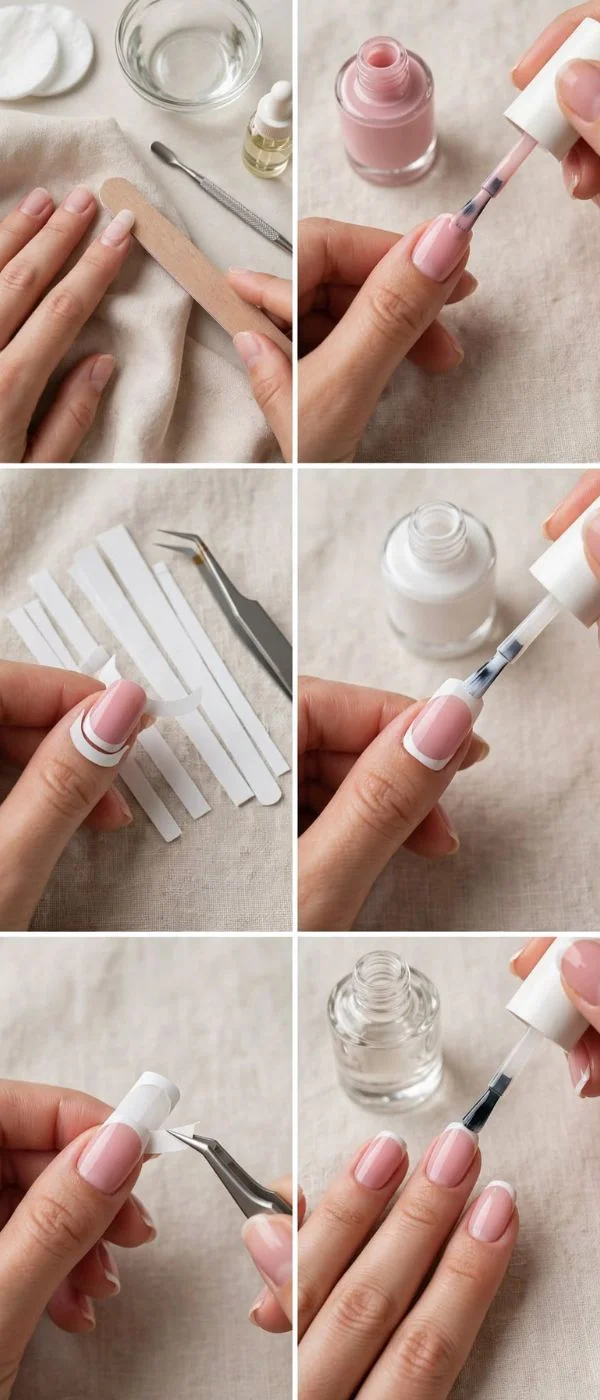
- French tips
- Hearts
- Small flowers
- Swirls
- Thin lines
- Glitter accents
- Minimal stars
- Color-blocked tips
Try One Accent Nail
If you are new to nail art, decorate only one or two nails. This reduces the amount of work while still giving the manicure a creative finish.
Step 14: Apply Top Coat
After your color and nail art have set appropriately, apply a thin layer of top coat.
A glossy top coat creates shine, while a matte top coat produces a softer, non-shiny appearance.
Seal the Free Edge
Lightly brushing top coat across the tip of the nail can help protect the edge from everyday wear.
Step 15: Let Your Nails Dry
Allow enough time for the manicure to dry before doing activities that could dent or smudge the polish.
Avoid immediately washing dishes, opening packages, or doing heavy household tasks.
Step 16: Moisturize Your Hands
Once the polish has sufficiently set, apply hand cream to the hands and massage it gently into the skin.
You can finish by applying a small amount of cuticle oil around the nail edges.
Easy Manicure at Home for Beginners
If you are doing your first manicure, keep the routine simple. Start with clean nails, choose one shape, use a neutral or light polish, and skip complicated nail art.
Beginner-Friendly Routine
A basic routine can be:
- Remove old polish.
- Wash and dry your hands.
- Trim if necessary.
- File the nails.
- Gently push back cuticles.
- Apply cuticle oil.
- Clean the nail surface.
- Apply base coat.
- Apply two thin color coats.
- Finish with top coat.
- Allow the nails to dry.
Manicure at Home Without Polish
You can still create a polished appearance without using colored nail polish.
Natural Nail Routine
Shape the nails, gently care for the cuticles, lightly buff only when necessary, and finish with cuticle oil and hand cream.
This gives the hands a clean, natural appearance while keeping the routine quick.
Quick 15-Minute Home Manicure
When you have limited time, simplify the process.
Fast Routine
Remove old polish, shape the nails, gently push back the cuticles, clean the nail surface, and apply a fast-drying base/color/top-coat system.
Avoid complicated nail art when you are short on time because detailed designs require additional drying and precision.
Manicure at Home for Short Nails
Short nails can look especially neat with simple designs.
Good Designs for Short Nails
Try:
- Micro French tips
- Sheer pink
- Milky white
- Nude gloss
- Tiny dots
- Minimal lines
- Small floral details
- Single-color polish
Keep decorative elements relatively small so the nail does not appear visually crowded.
Manicure at Home for Long Nails
Longer nails provide more space for detailed designs.
Creative Options
You can experiment with:
- French tips
- Chrome finishes
- Marble patterns
- Floral art
- Abstract swirls
- Ombre effects
- Glitter
- Animal prints
Long nails may require additional filing and maintenance to keep the shape consistent.
Common Mistakes to Avoid
A few small mistakes can make a home manicure look uneven or cause unnecessary nail damage.
Applying Thick Polish
Thick coats can remain soft underneath even when the surface appears dry. Thin layers are easier to control and generally dry more evenly.
Filing Too Aggressively
Excessive filing can weaken the nail edge. Use gentle strokes and stop once the desired shape is achieved.
Painting Over Oily Nails
Cuticle oil and hand cream are useful during nail care, but excess oil should be removed before polish application.
Skipping the Top Coat
A top coat can improve the final appearance and provide an additional protective layer.
How Often Can You Do a Manicure at Home?
There is no single schedule that works for everyone. The frequency depends on nail growth, polish wear, personal preference, and the condition of your nails and surrounding skin.
If your nails become thin, peeling, painful, or unusually brittle, give them a break from cosmetic treatments and avoid aggressive filing or buffing.
Frequently Asked Questions
What is the correct order for a manicure at home?
A practical order is to remove old polish, wash the hands, trim and file the nails, gently care for the cuticles, moisturize, clean the nail surface, apply base coat, polish, top coat, and allow everything to dry.
Should I cut my cuticles at home?
For basic manicure care, you generally do not need to cut healthy cuticles. Gently pushing them back is a simpler option. Avoid cutting or aggressively manipulating the surrounding skin.
Should I soak my nails before a manicure?
A short warm-water soak can soften the surrounding skin, but prolonged soaking is unnecessary. If you are applying regular polish, make sure the nail surface is completely dry and free of excess moisture and oils before painting.
How many coats of nail polish should I apply?
Two thin color coats are commonly enough for good coverage, although the exact number depends on the polish formula and color.
Why does my nail polish peel quickly?
Peeling can happen for several reasons, including oily nail surfaces, thick polish layers, insufficient drying time, or frequent exposure to water and household chemicals.
How can I make my manicure last longer?
Prepare the nail surface carefully, use thin coats, allow sufficient drying time, apply top coat, and wear gloves when doing household cleaning or dishwashing.
What is the easiest manicure for beginners?
A single-color manicure with a nude, pink, milky white, or light pastel polish is one of the easiest places to start.
Can I do French nails at home?
Yes. Beginners can start with simple French tips using a thin nail-art brush, French-tip stickers, or a suitable nail-art tool.
Is buffing necessary for a home manicure?
No. Buffing is optional. If you use a buffer, keep the pressure light and avoid excessive or frequent buffing.
What should I do if the skin around my nail is painful or swollen?
Skip cosmetic manicure work on that area. Pain, swelling, significant redness, pus, or other signs of infection may require professional medical attention rather than nail care.